
Get Started with ToonBooth Print Server
Get ready to streamline your photo booth printing process with ToonBooth Print Server. This powerful tool ensures fast and reliable communication between your ToonBooth software and printers, enhancing your event's photo output capabilities.
Recommended System Requirements:
Operating System: Windows 8.1 or later
Processor: Intel Core i3 or equivalent
Memory (RAM): 2 GB
Hard Disk Space: 200 MB free space
Network: Reliable internet connection for installation and software updates
Printer Compatibility: Compatible with most major dye sublimation photo printer brands.
Note: To print 4x4 prints, the DNP QW410 Printer is required. You can purchase it here: https://amzn.to/3U99aeP
Recommended Hardware Options: $209.95 Fusion5 10" Windows 11 Pro: https://amzn.to/4dc3DwC
Download Instructions:
1. Check System Compatibility: Ensure your PC meets the minimum system requirements listed above.
2. Download the Installer: Click the “Download” button below to start the download of the ToonBooth Print Server setup file.
3. Prepare Your System: Before installation, temporarily disable the Windows Firewall to prevent any connectivity issues with the printer server. This can be done by going to Control Panel > System and Security > Windows Defender Firewall > Turn Windows Defender Firewall on or off.
4. Run the Installer: Once the download is complete and the firewall is turned off, open the downloaded file to start the installation process.
5. Follow On-Screen Instructions: The setup wizard will guide you through the installation steps. Accept the license agreement and follow the prompts to install the software.
6. Complete the Setup: After installation, you can re-enable the Windows Firewall. Launch ToonBooth Print Server and follow the on-screen instructions to configure it with your ToonBooth software and printers.
Download the ToonBooth Print Server

Watch Our Installation Video Tutorial
Get started with your ToonBooth Print Server by watching our step-by-step video tutorial. This guide is designed to help you smoothly install and configure the print server on your Windows PC or tablet. Whether you're setting up for the first time or need a quick refresher, our video will provide you with all the information you need to ensure a successful installation.
In this video, you will learn how to:
Download the ToonBooth Print Server software.
Install the software on your Windows PC or tablet.
Connect the print server to the same WiFi network as your DNP printer.
Download the printer driver for your dye sublimation printer.
Configure settings to optimize printing performance for both 4x6 and 4x4 photo prints.
Troubleshoot common installation issues.
What you'll need before starting:
A Windows PC or tablet with internet access.
Install the software on your Windows PC or tablet.
Your printer model (we have tested this with the DNP RX1-HS or DNP QW410) set up and ready to connect.
Installed printer driver. You can download DNP printer drivers here: https://dnpphoto.com/Support/Downloads/Drivers-Tools
Step 1: Download the ToonBooth Print Server Software
Start by visiting the ToonBooth website. Here you'll find the Print Server software.
Complete the registration form with your details to gain access to the download link.
Scroll down and click on the download button to get the software that's compatible with Windows.
Step 2: Install the Software on Your Windows Device
If you're using Google Chrome, click on the download icon at the top right of your browser and allow the file to download.
Find the downloaded file on your computer, right-click on it, and select ‘Extract All’ to unzip the file.
Open the ‘ToonBooth Printer Server Folders’ and click on the ‘ToonBooth Print Server’ Windows installer.
If a Microsoft Defender popup appears, click on ‘More Info’ then select ‘Run Anyway’.
Follow the on-screen instructions to complete the installation.
Step 3: Turn off the Public Network Firewall
To ensure the Print Server communicates effectively with the ToonBooth app, you will need to turn off the Public Network Firewall.
It's a good idea to bring a mobile hotspot to events as most venues have a firewall which could block communication between the Print Server and the ToonBooth app.
Search for ‘Firewall & Network Protection’ in your system settings.
Click on ‘Public Network’ and toggle it to ‘Off’.
Step 4: Connect the Print Server to the Same WiFi Network as Your iPad
Make sure that both your Windows device and the iPad are connected to the same WiFi network. This is crucial for them to communicate without any issues.
Step 5: Connect the Windows PC to the Printer
Connect your printer to a power source.
Use the USB cable to connect the printer to your Windows PC.
Turn on the printer.
Step 6: Download and Install the Printer Driver
If you are using DNP printers, visit the official DNP website or use this direct link to access the DNP Printer Drivers.
Choose the appropriate driver for your printer model and download it.
Install the driver by following the setup wizard on your Windows device.
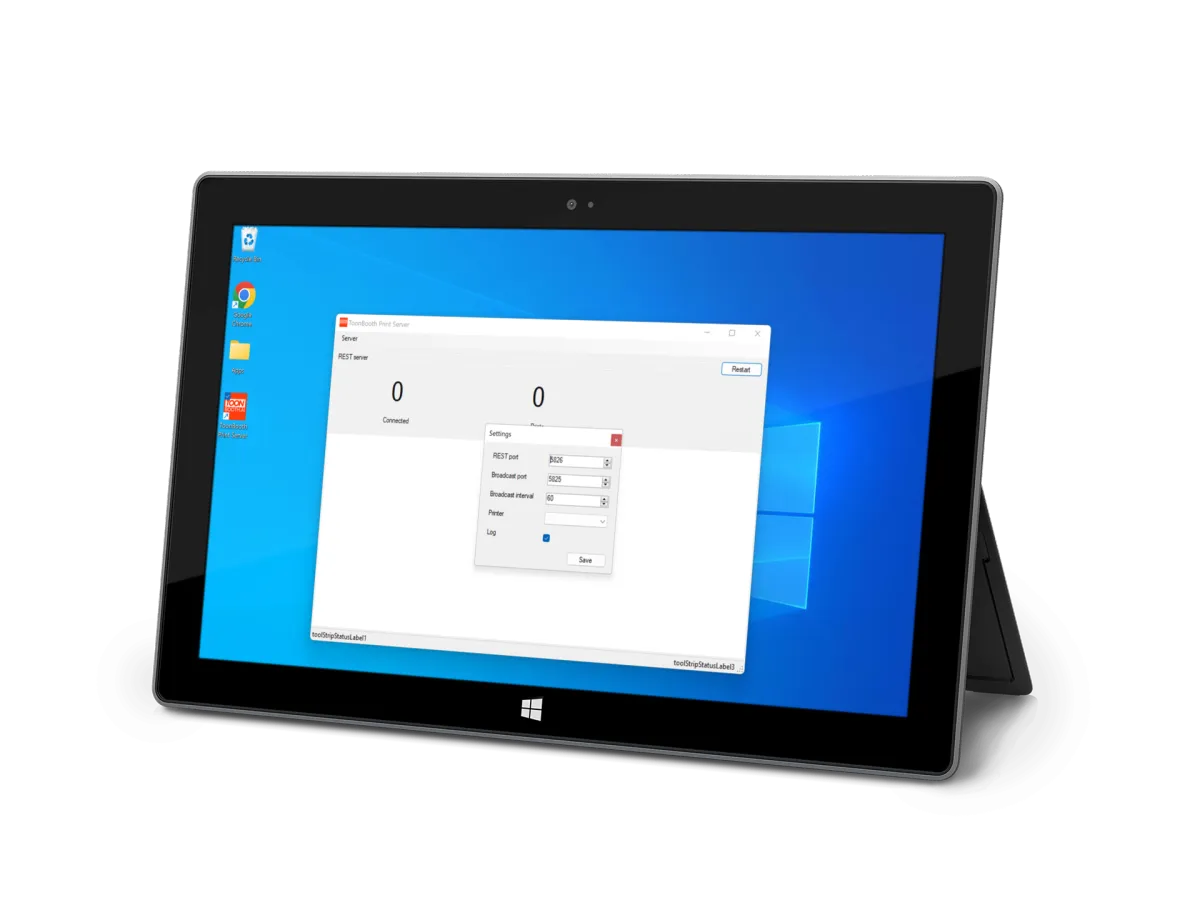
Step 7: Configure Printer Settings
Open the ToonBooth Print Server software on your Windows device.
Go to 'Printer Settings' and select your printer from the list of available printers.
Step 8: Troubleshoot Common Installation Issues
If your printer is not recognized, first check the connection and make sure both devices are on the same network.
Verify that you have installed the latest drivers and that there are no conflicts in your device manager.
If problems continue, reach out to ToonBooth support for help or check the FAQ section on their website.
Watch Our Print Server Connection Video Tutorial
Check out our Print Server Connection Video Tutorial! This concise and informative guide provides you with easy-to-follow visual instructions on how to connect your ToonBooth Print Server to the ToonBooth App. Whether you're setting up for the first time or need a quick refresher, this tutorial ensures a smooth and successful setup, allowing you to start printing photos seamlessly at your events. Perfect for users of all skill levels, it's designed to get your photo booth running efficiently with minimal hassle. Watch now to enhance your ToonBooth experience!
Step 1: Access Printer Settings in the ToonBooth App
On your device with the ToonBooth App, tap on Printer Settings.
Step 2: Activate Printer Option
Under 'Printer Option', toggle this option on to enable printing functionalities.
Step 3: Enter the Print Server IP Address
ind the IP address displayed on the ToonBooth Print Server. Make sure to enter this IP address exactly as it appears into the designated field in the app.
Step 4: Select Your Printer Model
Under 'Print Model', use the dropdown menu to select your connected printer. Make sure it matches the printer you have set up with the server.
Step 5: Set the Number of Prints Per Session
Adjust how many prints you want the printer to produce for each session. This can be set according to your specific event needs.
Step 6: Save Your Settings
After making all necessary adjustments, click Save to apply the settings.
Step 7: Open Server Settings on Your Windows PC
On your Windows PC, where the ToonBooth Print Server software is installed, click on 'Server'.
Step 8: Access Server Settings
In the Server interface, click on 'Settings' to adjust server-specific options.
Step 9: Select Your Printer on the Server
Under the 'Printer' dropdown menu in the Server settings, select the same printer you configured in the ToonBooth App. This ensures both the server and the app are synchronized.
Completion
With these steps completed, your ToonBooth Print Server should now be fully connected to the ToonBooth App. You're all set to start printing and bringing your photo sessions to life.
By following these instructions, you can ensure a smooth setup and reliable connection between your ToonBooth App and Print Server, leading to efficient and high-quality photo printing at your events.
Copyright © 2024 ToonBooth. All Rights Reserved.